Guidance - Peat depth survey for muirburn licensing
Peatland survey guidance for muirburn licence applicants
Contents
- Who needs to measure peat depth
- Why peat depth surveys are required
- Where do I need to survey?
- Survey method A
- Survey method B
- Preparing for fieldwork
- How to locate survey points
- Taking and recording measurements
- Further information
- Example survey
Who needs to measure peat depth
Anyone applying for a muirburn licence may need to carry out a peat depth survey. It will depend on the land you wish to muirburn and the purpose you are applying for.
This video provides a summary of the licence process for applicants:
Licensable purposes
For areas classed as non-peatland:
- managing the habitats of moorland game or wildlife
- improving the grazing potential of moorland for livestock
- conserving, restoring, enhancing or managing the natural environment
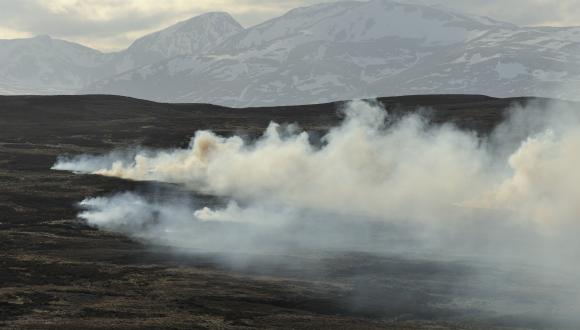
- preventing, or reducing the risk of, wildfires causing damage to habitats
- preventing, or reducing the risk of, wildfires causing harm to people or damage to property
- research
For areas classed as peatland:
- restoring the natural environment
- preventing, or reducing the risk of, wildfires causing damage to habitats
- preventing, or reducing the risk of, wildfires causing harm to people or damage to property
- research
Why peat depth surveys are required
Peatlands are defined in the Wildlife Management and Muirburn (Scotland) Act 2024 (‘the Act’) as areas of peat with over 60% of organic matter and a thickness of more than 40cm. This differs from standard soil definitions used in Scotland which define peat as a depth of 50cm or more. This means if you want to apply to burn for a non-peatland purpose, you will need to provide some extra information.
To help with this, we have published an interactive map which identifies if the land you want to burn is likely to be peatland or not.
This map was created using the best information we have available. It uses a combination of existing survey and modelled data from the James Hutton Institute.
The map is not directly comparable to previous peatland maps because it has been designed to identify land categories for muirburn licensing.
We acknowledge there may be some limitations in the mapping as the data is modelled. The purpose of the map is to indicate where peat is likely to be present and to highlight any areas where peat depth is not known. Peat depth surveys will help to improve the accuracy of the final licensed areas.
Our map shows 3 categories of land:
- peatland (peat layers of 50cm or more present)
- non-peatland (no peat layers present)
- uncertain (peat layers less than 50cm present)
Where do I need to survey?
Use our interactive map to identify whether an area is likely to be peatland or not, and if you need to carry out a survey.
The 3 categories of land in our interactive map are:
1. Non-peatland
Areas classified as non-peatland do not require a full 100m grid survey. However, you must still confirm the absence of peatland in these areas by walking over the land and taking occasional peat depth measurements (Method A).
You do not need to survey patches of non-peatland within a burn area you are submitting for a peatland purpose.
2. Peatland
Areas classified as peatland do not need to be surveyed for any licensable purpose.
Peatland areas only need to be surveyed if:
- you disagree with the classification (in our interactive map), and
- you want to license that area under a non-peatland purpose
Peatland surveys must be carried out in a 100m grid (Method B).
3. Uncertain
Areas classified as uncertain are likely to contain peat, but the depths are unknown.
A survey is required to identify areas which can be licensed for a non-peatland purpose (Method B).
You do not need to survey these areas if you are applying for a peatland purpose.
There are 2 types of peat depth survey methods in this guidance. These methods should be used to check the areas you wish to burn.
Survey method A
This walkover method should be used to check areas classed as ‘non-peatland’.
It involves walking over the land to check any areas that look like they may be peatland, and to record if any depths over 40cm are found.
The purpose of this method is to identify any areas that should be excluded from a non-peatland licence.
When planning a route for method A, consider landscape features that may indicate the presence of peat, including:
- plateau blanket bogs on gentle to moderate slopes
- burn sides
- saddles
- valley bottoms
- wet areas with vegetation such as sphagnum moss, rushes, purple moor grass or sedges
How it works
Before you start the walkover, you should plan a route to check any areas where the land features indicate peat may be present, for example, valley bottoms and wet flushes.
You should take occasional peat depth measurements in these areas and record if you find any depths over 40cm.
If you find any peatland, take additional measurements at 100m intervals or less around the point to determine the extent of the peat area (like method B).
Record your results in our blank survey template.
You must type your results in the Excel template provided. We cannot accept other formats. If you are struggling with this, get in touch with the Licensing team at [email protected] or 01463 725364.
With this method, you should:
- cover a variety of vegetation and landforms present within the land area, paying particular attention to wet hollows and ‘soft’ areas
- visually survey the land from a distance to identify which areas are potentially peatland and these should be checked with a probe
- record the depth (cm) of any points over 40cm – exact depth or to the nearest 5cm (where the measurement is between 40-45cm – round up to 45cm)
Survey method B
This process can be used for an area that is classed as ‘uncertain’ or ‘peatland’.
You only need to use this method on a peatland area if you consider the area has been incorrectly categorised by our map and you want to license that area under a non-peatland purpose.
This method involves taking sample points in a grid pattern at 100m intervals or less.
You can download survey co-ordinates for your land using our interactive map.
Alternatively, you can create your own 100m grid sampling points using a map and blank survey template.
We understand that some applicants may have existing peat depth data from previous surveys. We will accept existing data you have, provided the survey was carried out in line with our guidance. This means that the measurements must have been taken at 100m intervals or less.
You must type your results in the Excel template provided. We cannot accept other formats.
How it works
Survey points are recorded in a systematic 100m grid.
With this method, you should:
- establish survey points in a grid pattern (this is provided if you use the interactive map)
- use a GPS, mobile phone or map to locate these points (see ‘How to locate survey points’ below)
- avoid landforms such as rocky outcrops and burn sides – if you encounter these, you can move the point slightly
- record the depth (cm) at each waypoint – exact depth or to the nearest 5cm (where the measurement is between 40-45cm – round up to 45cm)
We published an interactive map to help make it easier to create your 100m sampling grid. We acknowledge that it may not always be possible to survey the exact locations due to obstacles such as tree roots or boulders.
If you encounter an obstacle, you can move away from the point and take the measurement at the nearest practical point. Record the distance from the sampling point in the spreadsheet.
You should only survey areas you intend to apply for burning.
We understand this type of survey can take time to carry out. You may wish to apply for a smaller area in the first year and submit more data later. Licence holders can add survey results over time by requesting a licence update.
Preparing for fieldwork
For both survey methods, you should:
- check for hazards such as overhead cables or underground utilities within the area
- plan your route to consider any obstacles such as waterbodies, watercourses or ditches
- prepare a recording device
- charge your devices and carry spare batteries/a charging pack for longer surveys
How to locate survey points
Our interactive map will provide you with a survey spreadsheet and GPX file. These files contain your survey co-ordinates.
The GPX file can be loaded into a GPS device or imported into a mobile mapping application on a smartphone or tablet. This allows you to navigate to those points when you are undertaking the survey.
There are a few ways to do this:
This is a simple app that displays a grid reference based on where you are standing. The reference will change as you move. You can use this as a navigation tool along with the Excel spreadsheet.
This option requires a Google account. Once logged in, you can create a new map and upload the NatureScot GPX file. This will record the survey points in Google maps. You can then open the app on your phone and navigate to the points.
This works like Google maps but requires a premium account to upload grid references and use them.
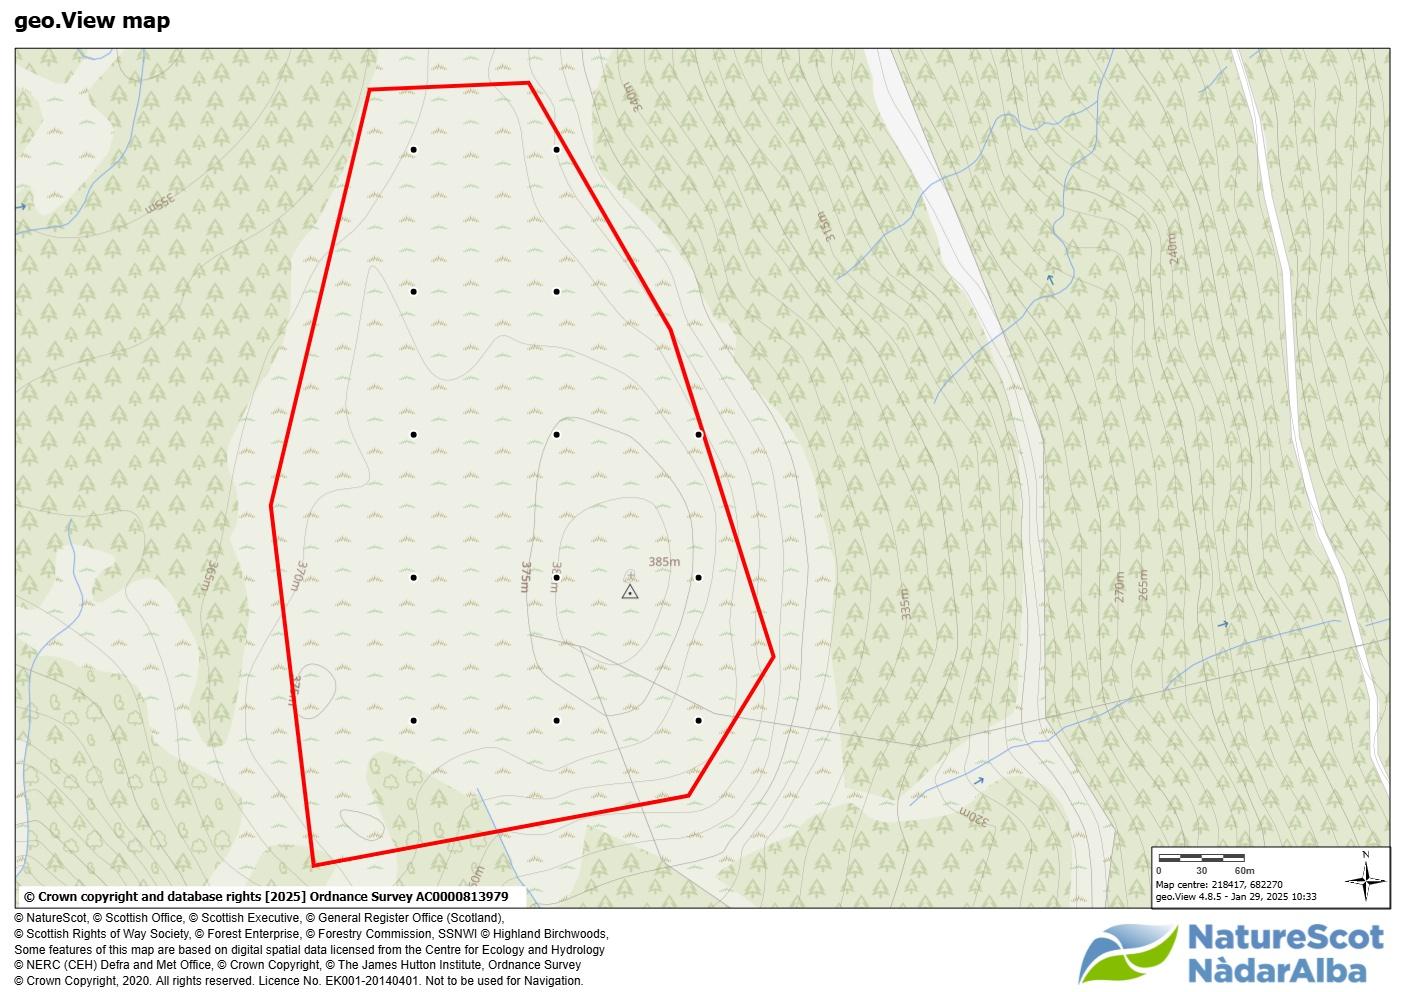
Example 100m grid of survey points
Taking and recording measurements
Peat is an organic layer with low resistance to penetration.
You may wish to check for presence of peat at the surface using a soil core sampler or spade.
The depth of peat is best measured using a specialist tool such as a narrow T probe or core sampler. When using these tools, record the exact depth you find.
You may choose to use a 1m rod which could be marked with tape at 5cm intervals. Because this is less a less accurate tool than a peat probe, you need to round up or down to the nearest 5cm. Where your measurement is between 40-45cm – this should be recorded as 45cm.
You must record and submit accurate measurements (not ‘greater than’ or ‘less than’ 40cm).
Follow this process to use the peat probe or rod:
- Push the probe/rod into the ground until it stops sinking (where it comes to a halt or where you feel resistance)
- Mark or note the ground level on the probe/rod
- Record the depth and grid reference
- Remove the rod
Please note that it may be difficult to push the rod through the surface if the peat is dry and/or the vegetation is thick.
Further information
Probing locations
Select a probing location that is representative of the immediate area. Tussocks and hummocks raise the surface level above the actual peat level. The peat depth is often lower on rocky knolls and near water courses ditches due to erosion and degradation of the peat.
Recording the exact position of the probing point is more important than sticking to an agreed pattern. Recognising there is always a degree of error in the measuring due to the accuracy limitations of GPS (usually between 2-5m). Ground conditions may also restrict access to the exact grid point. Include a 10-digit grid reference with 2-letter prefix (for example, NO3452554375) of the actual probing point to allow for any compliance checks.
Obstacles
Peat which sits above rock, gravel, or clays. If the rod reaches the mineral geological substrate or a mineral subsoil below it will either stop suddenly, or get increasingly difficult to push in. When extracting the final rod check the tip which may have sand or clay at the point which indicates you have reached the substrate below the peat.
Tree remains buried in the moss may affect the depth at which the probe stops. Where the peat depth unexpectedly becomes shallower it is advisable to probe a metre away from the original probing.
Defining the extent of a peatland area
If an area of peatland is found, you may wish to take additional measurements to further demonstrate the extent of the area.
Health and safety
You should never use peat probes near power lines or buried utilities. Always take care when pulling out the probe.
Please refer to the HSE manual lifting guidance and follow the manufacturer’s instructions.
On sloping ground always insert the probe vertically.
Selecting a peat probe
A peat probe with a notch or collar near the end is useful for providing a small sample of the material to assess if it is peat. This material can be rubbed between your fingers to confirm mineral material cannot be felt.
Example survey
| Sample point ID* | OS Grid Reference* | Peat depth (cm)* | Distance from point (m) |
|---|---|---|---|
| 1 | NN 14286 77219 | 38cm | 3m |
| 2 | NN 14286 77219 | 45cm | 0m |
| 3 | NO 08547 29149 | 35cm | 1m |
It is important that you record this data in the correct format. Results must be typed in the Excel template. If you are struggling with this, get in touch with the Licensing team at [email protected] or 01463 725364.
Download the muirburn peat depth survey template (xls).
Contact us
If you need help with either of these survey methods, contact our licensing team.
- Telephone number: 01463 725364
- Email address: [email protected]