Peatland ACTION - Technical Compendium - Restoration - 7 Stabilisation and Revegetation
7. Gully and Bare Peat Restoration: Stabilisation and Revegetation
Objectives of stabilising and revegetation techniques
In principle, all gully and bare peat restoration techniques aim to stop further loss of peat from the bare peat surface (whether vertical or horizontal) by the combined actions of wind, water and oxidation, through re-establishing vegetation on such surfaces. Restoration of hags, peat banks and peat pans may simply require reprofiling and/or revegetation but gullies have the additional factor of acting as water courses and therefore need additional considerations (see Section 6).
Actively eroding and exposed bare peat creates an extremely hostile environment for plants to grow and it needs to be stabilised before vegetation can then be re-established.
This section outlines a range of methods for restoring bare peat to a more stable, revegetated condition to prevent further ongoing erosion, and to enable active peat-forming habitats to be re-established.
General guidance and principles - read me first
General Guide
• Check first whether a Controlled Activities Register Licence is required from SEPA and if the site is subject to other constraints
• The geomorphological context significantly influences the approach, as well as the pattern and trajectory of revegetation.
• Gully width, gradient, depth, steepness of sidewalls and base material all dictate the approach to flow management, stabilisation and revegetation.
• Steep peat faces found in hags and gully sides cannot be readily revegetated. The gradient must first be reduced by reprofiling (see Section on hag/gully/peat bank reprofiling).
• In narrow steep gullies, re-vegetation should begin to propagate upstream from local blockages.
• In broad shallow gullies, and flatter bare peat areas, re-vegetation may propagate in either direction from the interventions made.
• The site’s hydrological characteristics will need to be considered. Bare peat surfaces in summer, being dark, can become very hot and hostile to vegetation recovery. The same exposed surface can be susceptible to erosion from wind, rain and frost heaving. Flow rates, ‘flashiness’ and whether flow is sheet or channelised also need to be considered in the context of re-vegetation potential.
• The chemical conditions of the bare peat must also be borne in mind. The chemical and nutrient status of the peat surface affects the type of vegetation that can colonise it.
• Revegetated gully sides can improve resilience; they are likely to retain moisture better during dry weather, and hence would be less vulnerable to erosion during flow events that do reach the sides of the structures put in place to slow the flow.
• The decision on whether or not to revegetate will need on site evaluation. It is not necessary to intervene in every circumstance. If the hagged sides have naturally recovered and are vegetated, then intervention is not necessary. Some areas may naturally revegetate if other successful interventions are made.
• Near natural bog hummock and pool complexes can appear to be hagged on first viewing. However these are very fragile systems and should not be restored unless areas of significant erosion are identified and access can be achieved without compacting the peat and disturbing the vegetation too much.
7.1 Hag / Gully / Peat Bank Reprofiling
Aim of the Technique
To prevent further erosion of the peat at the face of a hag, gully or peat bank (stopping peat erosion and encouraging revegetation in conjunction with slowing the flow of water).
Best Practice
• Ensure the cause of continued erosion has been addressed, e.g., reduce herbivores, or divert flow of undercutting watercourses.
• Roll back the vegetation, preserving the root structure
• Remove and reprofile the underlying peat to 30-35o Sometimes a 40-45o can work if site conditions call for it.
• Hags should be re-profiled with machinery from above unless site specific constraints prevent this. For example, hags > 2 m need to be re-profiled with machinery from above AND below to ensure that the slope has adequate vegetation to not start eroding again.
• Remember to work the gully bottom edge. Leave the toe intact but manage the new flow channel away from the toe (see sections on Flow Management, baffles or spur surface bunds can be used).
• Ensure turves are laid bridging the break-in-slope at the top of the hag. This prevents slumping, as water can get behind the turves and wash them down the slope. Tamping can be less disruptive than block turving. Compaction is key.
• Ensure turves used have sufficient depth to them as they will be on a relatively highly draining surface and so they need to have a root system that can hold together long enough to allow new growth.
• Larger, wetter turves are better. Turves can be harder to handle when dry. Using 30-45 cm turves has been successful. Heather dominated turves stretch better, but heather dies off more than grass.
• Borrow pits used for turves need to be reinstated carefully so not leaving behind new areas of bare peat vulnerable to erosion (see Section on Borrow pits).
Appropriate Machinery
• Excavator on low pressure tracks with toothed bucket (ideally with universal tilt bucket – to help scrape/stretch turves when re-covering ground).
• Disturbance can create very mobile and low-density peat. There is a risk of machinery being bogged down, so consider using mats.
• Just using bog mats alone may not be enough and may slow progress.
• The size of excavator depends on ground conditions, length of reach needed, angle of slope and site access. For instance, a larger machine with better reach may be required on higher hags.
• Consider the maximum slope and height of gully edge/hag/peat bank and whether it is safe for machinery to operate
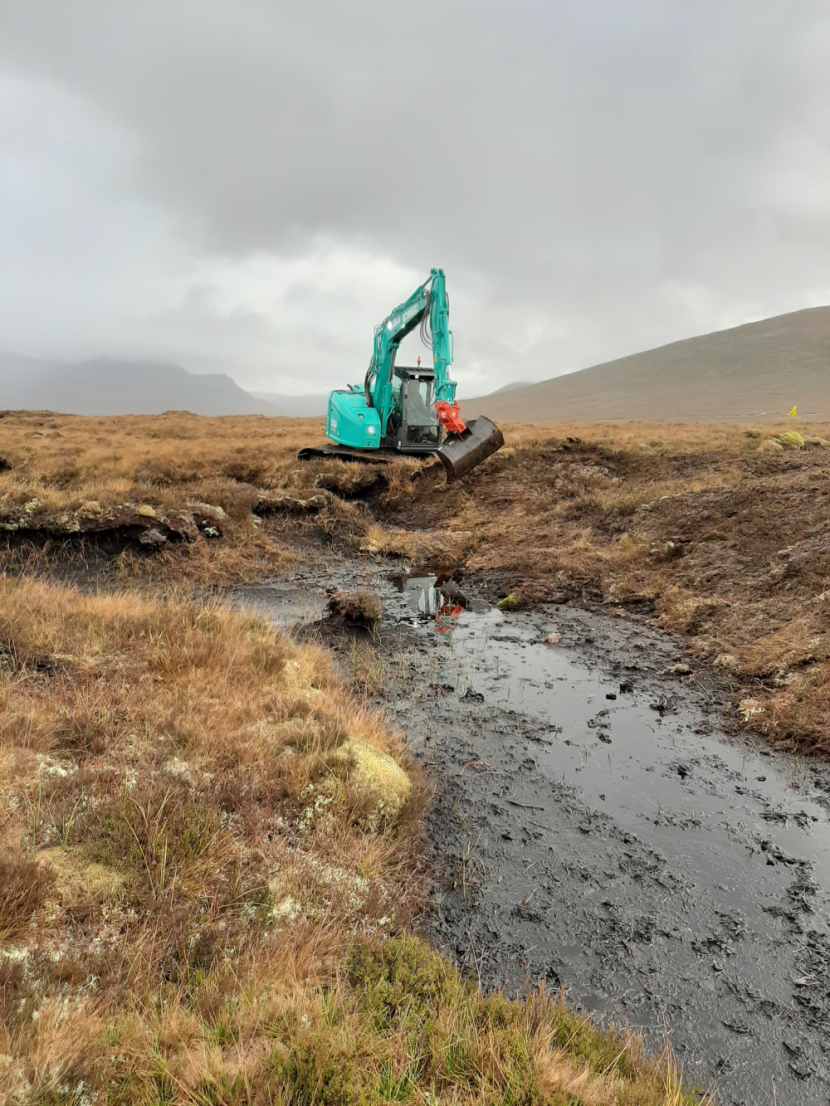
Machine operator reprofiling a gully edge. ©Emily Taylor - Peatland ACTION/Crichton Carbon Centre
When most likely to succeed
• On longer, more linear hags where machine access is good.
• On hags less than 2 m high.
• When turves are well knitted together.
• When using large, deeper turves from well vegetated donor areas.
• When herbivore impact is low.
• In a lower water energy system or where other work has been done to slow water flow through the system.
When most prone to failure
• If using turves dominated by lichens – these can be less stretchy and more brittle (resilient to movement). Turves shouldn’t be too thin and fragile. Digger drivers should be trained to recognise what types of vegetation to target and avoid.
• If done by hand, as the turves can be too small and lack compaction and knitting together.
• On very narrow convoluted hags where there is a lack of good turves. The donor areas need to be carefully considered.
• Very deep narrow gullies where the sides are too steep.
Points to Remember
• Gully systems can be subject to very high flow rates resulting from snow melt and heavy rain.
• Restored areas should only have low grazing pressure. Animals can move through a site or be present in large numbers at one time in a year, and consideration should be given to how to best avoid animals accessing newly reprofiled areas. Crossing points may need to be considered for deer and stock.
• Growing conditions are much slower in uplands of Scotland, so consider the timing of works to ensure quick re-vegetation on sites.
• This technique can have multiple benefits for land owners/mangers; eroding hagged areas can be difficult to access, lead to loss of grazing and stock, have a big visual impact, have implications for downstream water quality and sedimentation of natural watercourses.
• When used in the right circumstances and delivered well this technique can have quick, high impact results and represents good value for money.
• Machine access and good machine operation is essential.
• Slowing and disrupting the flow of water at the head of gullies (where you may find micro gullying/erosion) may be required (e.g., surface bunds).
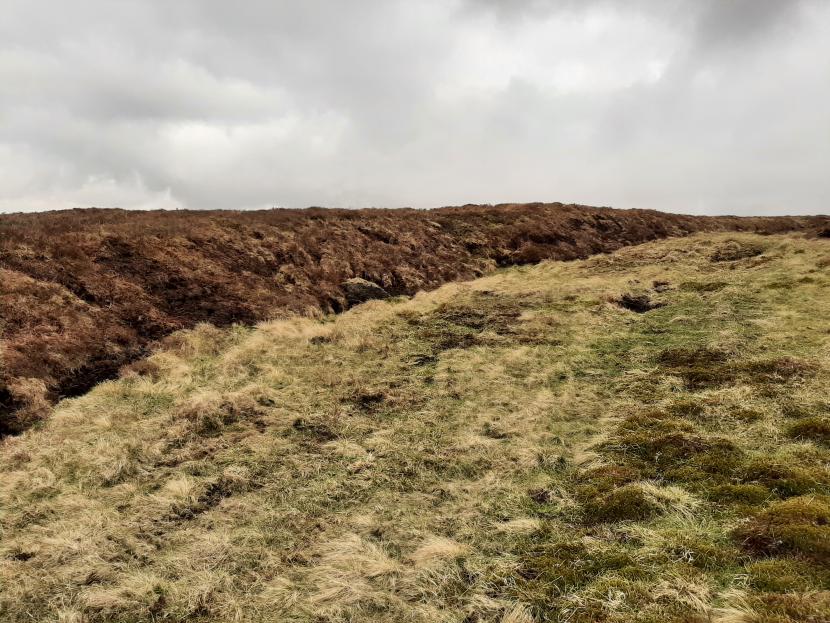
Example of reprofiled peat face. ©Emily Taylor - Peatland ACTION/Crichton Carbon Centre
Further Guidance & Support
Peatland ACTION Project Officers are available to help you with your project. Please contact us as at [email protected] to be put in touch with your local Officer.
The following video showcases the reprofiling technique on an isolated peat bank: SNH Peatland ACTION video 3 Reprofiling FINAL 1280x720
Peatland ACTION - Reprofiling video
Click for a full description
Duration
01:54
A short video explaining the techniques for reprofiling isolated bare peat banks on peatlands.
To see the full set in the series: https://www.youtube.com/playlist?list=PLSTn6yg6zH_-f68gbAcjL4q4oHRCBt-NB
7.2 Techniques to Re-Vegetate Gullies, Peat Pans and Micro-Erosion - Mulching:
Aim of the Technique
To support the re-vegetation and stabilisation of bare peat, particularly when it cannot be reprofiled (due to e.g., access limitations for machines) or there are large areas to cover.
Best Practice
• Water flow must be dealt with first (see Section 6). Even on flat surfaces surface water movement can still be high and therefore it is crucial to sort out water flow across an area for bare peat techniques to have a chance.
• All these techniques may in certain circumstances benefit from the application of lime and fertiliser, to increase surface pH and encourage plants to establish. The amount and concentration of chemical should be low and exhausted quickly to ensure appropriate species colonise. Don’t spread fertiliser alone as this is unlikely to be effective - the pH may require boosting with lime for phosphate fertiliser to be absorbed by plants. Any application of fertiliser or liming should be discussed with the Peatland ACTION officers on a case-by-base basis, to ensure there is no loss to water courses
• Consider whether the surface may need scarifying if there is a water-repellent crust (e.g. after a wildfire).
• Ensure there is good access to the mulch site and consider the impacts of transportation from the donor site. Moving mulch is heavy work.
• Mulch needs a good donor site, with heather and good mix of cotton grass and mosses. Donor sites should always be agreed with contractor prior to cutting. Although the donor site must be cut low (to get mosses), care should be taken not to expose the peat surface. Ensure donor sites contain mosses and plant species that can establish at your restoration sites – e.g., Sphagnum needs to be the appropriate species.
• Ensure mulch has the correct structure, as this can be just as important if creating a protective layer, as the seed content; too mossy is not good, it ideally needs a good proportion of heather fragments. Mulches ultimately need good balance of plants and structure. Don’t get too much dead matter (donor sites therefore need to have a short sward height).
• Mulch should be collected and applied as soon as feasible to ensure it is still viable. Autumn is best to cut mulch from donor site because the seed source will be present. However, it can present challenges for application through winter weather conditions.
• Ensure mulch is applied to areas that will not be flooded by other interventions that are changing water levels on site. Deal with any reprofiling or bunding interventions first, before mulch applications. Do not apply mulch directly behind bunds or dams where they are likely to get washed away.
• Mulch must be thick (3.5-5 cm at 330-695 bags per hectare), especially in upland areas. Compaction may be useful.
• Mulch should not be applied in a dry period as it can blow away. Consider other weather effects. Frost heave can have a big impact on mulch - consider applying mulch with a geotextile or sufficiently deep if this will be a problem. The best season for applying mulch can be spring after snow melt, but bird breeding season limitations and the storage issues if cut in autumn can present problems. Often cutting/application of mulch is very site/condition dependent.
• Deer, goats, hare and sheep may be attracted to the mulched area and break it up. This is likely to cause heightened tracking damage to the applied areas and the immediate surrounding area.
• Donor sites can respond well. Donor sites can be linked to habitat management and keepers are now seeing heather cutting as a good alternative to muirburn.
Appropriate Machinery
• Mulching are carried out by hand on small sites or particular areas. Mulch can be spread by some modified machines but application by hand has given better results as “nooks and crannies” can be targeted.
• Transporting material to a site needs consideration. Argocats are good. Helicopter use may need to be considered if donor sites distant but consider the additional costs and fuel efficiency against alternatives.
• If helicopter transport is involved, the team on the ground must be trained in working within helicopter landing areas.
When most likely to succeed
• When the need for fertilisation and/or lime has been carefully considered in the frame of wider environmental considerations
• When undertaken in conjunction with bare peat stabilisation techniques.
• On less exposed sites within the wider landscape.
When most prone to failure
• On exposed sites - water runoff, wind, rain and snow melt can still be major factors in eroding peat.
• If herbivores are present – they break up and kill mulch.
• If brash is spread too thin – it needs to be 3 to 4 cm thick.
• If the netting degrades faster than the vegetation recolonises. Different types and thicknesses of netting degrade at different rates. E.g., geo-jute netting has been found to degrade quicker than bare peat can be colonised by cotton grasses, so it may not last long enough (particularly on high sites where growing season is short).
Points to Remember
• It can take a considerable period for vegetation to establish at higher altitudes. This is important when considering time taken for bare peat to revegetate and also recovery of donor sites.
• Fertiliser/lime use should be discussed with Peatland ACTION officers.
Further Guidance & Support
Peatland ACTION Project Officers are available to help you with your project. Please contact us as at [email protected] to be put in touch with your local Officer.
Watch video showing how a living mulch rich in heather and sphagnum is added to a bare peat pan at a Peatland ACTION restoration site.
7.3 Techniques to Re-Vegetate Gullies, Peat Pans and Micro-Erosion – Textile application
Aim of the Technique
To support the re-vegetation and stabilisation of bare peat, particularly when it cannot be reprofiled or revegetated using borrowed turves (due to e.g., access limitations for machines) or there are large areas to cover.
Best Practice
• Textiles may be an option in very exposed sites. It tends to be more effective if a layer of mulch is put down first (see Section 7.2).
• Large areas can be covered quickly as geo-textiles can be rolled out like a carpet over flat areas. Work can be done by volunteers.
• A wide range of textiles are available (e.g. coco mesh, sisal netting, geo-jute). Choose a textile that will not degrade faster than the time it takes for the peat to be re-colonised. Different types and thicknesses of netting degrade at different rates. E.g., geo-jute netting has been found to degrade quicker than bare peat can be colonised by cotton grasses, so it may not last long enough (particularly on high sites where growing season is short).
• Consider what the textiles are made of and avoid plastics. Even degradable textiles, while breaking down, may still be present in the peat as a foreign material.
• Think about netting weave - a good rule of thumb is 2 to 3 cm2 squares.
• Textiles can be very expensive with long ordering and delivery times. Geo-textile is often imported.
• The textile may need to be cut to size. They can be heavy to move around and their weight can cause them to slump once installed.
• Textiles usually require ongoing checking and maintenance to re-insert pegs and/or correct slumping. Damage may be caused by animals moving across geotextiles.
• Consideration should also be given to deer density and movement, rutting stags are commonly found adorned or entangled in discarded materials, wire, wire, geotextile, jute.
• Sheep’s wool has been used on some very small areas. It worked well as it felted together, providing structure, as well as a seed source, as the fleece itself has already trapped seed, so grasses started to colonise bare peat. This is an emerging technique which needs further monitoring, with a number of trials underway. When considering using sheep wool, please contact Peatland ACTION officers first, as an assessment of the risk to water courses from e.g. sheep dip chemicals must be carried out and approval or licensing sought from SEPA.
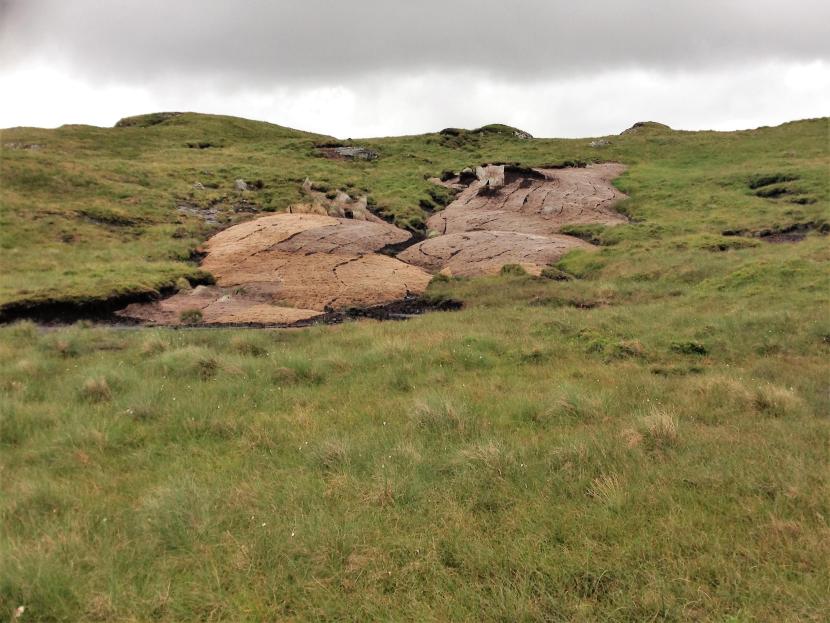
Image showing textile matting used to cover areas of bare peat to help peatland regeneration and prevent further erosion. ©Peter McPhail - NatureScot.
Appropriate Machinery
• Applications of textiles are usually carried out by hand on small sites or particular areas.
• Use untreated wooden pegs (not metal or plastic) to hold netting in place– at least two per edge per metre. Pegs should be long with a notch at the top to keep netting secure.
When most likely to succeed
• When used with mulches
• When undertaken in conjunction with bare peat stabilisation techniques.
• When it is pegged down well with split wooden pegs
• Where protected from the wind.
• Where grazers can be excluded from the area.
When most prone to failure
• On exposed sites - water runoff, wind, rain and snow melt can still be major factors in eroding peat.
• If herbivores are present.
• If the textiles degrade faster than the vegetation recolonises.
Points to Remember
• Textiles can be applied in very exposed sites to help re-vegetation, however consider materials, cost, and the dangers to wildlife.
Further Guidance & Support
Peatland ACTION Project Officers are available to help you with your project. Please contact us as at [email protected] to be put in touch with your local Officer.
7.4 Whole turfing
Aim of the Technique
To stabilise and revegetate an area of actively eroding bare peat. It can be a way of quickly establishing vegetation on bare peat, providing structure and a local seed source.
Best Practice
• Prepare the site by re-profiling slopes and gullies to under 35 degrees for reprofiling bare peat faces < 2 m height, remove isolated turfs or small hags and re-distribute the turf. On taller peat faces, up to 45 degrees may still be appropriate so as to avoid creating an area more than 3 x the original peat face.
• Bunding (see section 5 and also 6.1 for surface bunding in gullies) is the most important technique within the bare peat areas as it manages the water. Surface bunds or dams may be needed to stop whole turves slipping. Do not to hold back too much water or the turves may float, move, and not help vegetation establish.
• For greater speed and efficiency a dumper moves turves and an excavator puts them into place. Also consider two dumpers working simultaneously (one is filled while one gets emptied).
• Identify a donor site for suitable turfs. Donor sites should be on flat or gently sloped ground and quite wet with deep peat (>1 m). It is important to keep 5 to 10 m strips of intact (uncut) vegetation across the donor site.
• Use large turves. Ideally use turves as large as the machinery allows and can keep in one piece. Make them deep enough to contain the whole root zone, being more generous if the target area has little peat. Larger surface area is better here and helps the turves to seat in.
• Donor sites can become very wet after cutting. Water may come to the surface and there is a risk this could be a precursor to gully formation.
• Turves should be placed gently and as close together as possible, gently tamping them down and together.
• After borrowing the turves, cross-track across donor sites. This is very helpful for levelling the surface, bringing Sphagnum up to surface and encouraging regrowth.
• Machine tracks pick up bare peat which gets shed across site. Continual tracking across a site can deposit bare peat on the surface and can cause tracking damage to the vegetation and root mat that holds the surface together. This needs close management.
• Contractors need to be very tidy and fill in any holes created and cut and track along contour lines to avoid creating water flow pathways down slopes. Contour strip removal could increase a risk of slope movement if the slope is too steep or convex. Balance the risks with the site-specific peat slide risk assessment. Cutting strips should occur no more frequently than every 3 m and not in direct downhill fall line with each other.
• Working with whole turves may bring in essential things, such as root-associated bacteria and fungi which may help vegetation establish.
• Using whole turves is more resilient than mulch, so a better option on exposed sites.
• Use turves to make a full turf cover, or on very flat ground as a lattice, spot patches or lines to slow water and sediment loss while aiding adjacent vegetation colonisation. The choice can depend on factors such as the volume of donor turf available and distance to site. Balance the benefits of stopping severe erosion with tracking impacts.

Turfed area of previously bare peat.
Click for a full description
Bare peat re-turfed, gullies re-profiled and turfed using donor material. Donor site 300 meters away.
Excavators working on the bare peat pick up small pieces of peat in their tracks which is deposited on top of the vegetation when they move off. Over time this material is washed into the turf.
©Stephen Corcoran - Peatland ACTION / Cairngorms National Park Authority
Appropriate Machinery
• Low ground pressure excavator with toothed bucket and ‘thumb’ to pick up turves.
• Soft-track dumper to move turves.
• A 14 tonnes machine will dig deeper, larger turves.
When most likely to succeed
• When you have good donor material; quality turves (heather dominated) close to your site.
• When you have the right equipment or moving turves (soft track/ dumper truck).
When most prone to failure
• When turves are lichen dominated.
• When a contractor is inexperienced or doesn’t have the right equipment.
• If whole turves have been applied to areas which have been bunded too high (so raising water levels and causing turves to slip) or ineffectively (causing turves to wash out).
Points to Remember
• Visually, it is instantaneous - therefore having a positive impact on the landscape.
• Donor sites could start to become erosion sites. Donor sites must be wet enough so they do not dry out.
• Consider using whole turving when the growing season is very short, weather is harsh or the area is unlikely to respond well to other revegetation techniques such as mulching, seed plugs or coir matting.
Further Guidance and Support
Peatland ACTION Project Officers are available to help you with your project. Please contact us as at [email protected] to be put in touch with your local Officer.
7.5 Reinstating Borrow Pits and Donor Turf Sites
Aim of the Technique
To avoid new erosion forming at areas where turf and peat is borrowed for dams and reprofiling. Aim to achieve this by minimising the amount of bare peat left at the borrow pit site and optimising the conditions for plants to regrow.
Best Practice
• The size, depth and number of borrow pits should be no more than the minimum required to form the feature of interest (whether the borrow material is used for a peat dam, surface bunding or whole turving techniques).
• Wherever peat is borrowed as well as the turf, a borrow pit remains that requires to be instated. To a lesser degree, removing turves also leaves a depression in the surface that needs to be revegetated.
• Borrowing should be done at random locations that are spread out across the landscape as much as feasible, rather than concentrating borrow pits in a small area or creating large ponds or lines of borrow pits. Creating lines of borrow pits could result in subsequent erosion linking them up to create a new drainage / erosion feature
• Turfs will work best if the root structure is borrowed too, so borrow pits should not be too shallow, but allowing some root structure to remain if possible allows the possibility of some plants re-growing from the roots. The root structure will also help to protect the peat from erosion.
• Peat is a reasonably elastic material and therefore borrow pits can be reinstated by various techniques, such as gentle stretching of the sides of the pit into the middle, reprofiling across the borrow pit, stretching adjacent turves across the pit surface and patting the sides down to create a smooth, shallow depression.
• Avoid creating steep sides as these can trap animals in the borrow pit. Peatland vegetation can also revegetate the borrow pit more easily on a shallow slope than a steep one.
• Borrow pits should be covered with the appropriate vegetation where possible. Where the immediate vegetation is dense enough, it may be possible to stretch adjacent turves. Seeding with e.g. Sphagnum on its own may not give good results (see Section Transplanting Propagules).
• The surface is then pressed down firmly with the back of the bucket. Tamp down turfs so that they have a good contact with the peat, rather than leaving clumps of turf standing above the peat surface. This will help to stop them drying out or being washed away.
• If insufficient material is available to re-instate the borrow pit, leave any remaining depressions as shallow as possible and avoid leaving steep banks.
Appropriate Machinery
• A bucket with tilting or swivel hitch.
When most likely to succeed
• Smaller and shallower borrow pits are more likely to revegetate quickly and successfully.
• Successful growth of the reinstated vegetation is more likely if there is as little roof disturbance as possible when stretching or transplanting turves.
• Areas with a healthy sward and better growing conditions, e.g. further south, lower altitudes, will recover better, so may be worth considering when planning what the ground can cope with – e.g. if borrowing large amounts of turf for whole peat turving or cell bunding of peat pans.
When most prone to failure
• The deeper the borrow pits are, there is an increasing risk of a new drain line forming there if too many borrow pits are placed in one line, or of cracks forming if on a susceptible convex slope.
• Revegetation can fail if the turves on top are not pressed down, if the turves are too thin, or if material with sparse vegetation (e.g. heather and lichen only) is used. The vegetation on such turves is likely to be highly susceptible to drying out in periods of drought.
• Avoid making borrow pits in areas subject to high water flows, e.g. close to a stream which will flood or in parts of the landscape where water will be focused during heavy rain fall.
• Avoid borrowing turfs from already vegetated gully bases, as these are relatively high water flow areas and it could create a source of new erosion. A vegetated gully base is what restoration is aiming for, so it shouldn’t be damaged.
Points to Remember
• Limit the size and depth of borrow pits as much as possible and re-instate as much as feasible.
• Avoid leaving deep and/or steep sides pits as they can trap small animals and slow down revegetation rates.
Further Guidance & Support
Peatland ACTION Project Officers are available to help you with your project. Please contact us as at [email protected] to be put in touch with your local Officer.
7.6 Transplanting Propagules
Aim of the Technique
Physically plant plugs/propagules into, or add Sphagnum fragments onto, bare peat to encourage revegetation. Works best on bare peat where revegetation needs to be accelerated.
Best Practice
• This technique should be used in conjunction with techniques to stabilise bare peat and manage water flow.
• The water table needs to be consistent - raising the water table could float out vegetation or make the area too wet for things to colonise. Likewise, you don’t want pools to dry out, crack and lose peat in summer.
• Use a bulb planter to cut and transplant plugs from suitable vegetation within the vicinity of bare peat (plugs seem to take better than cotton grass propagules).
• Handfuls of Sphagnum heeled into bare peat can be effective, however bare peat can heat up significantly on sunny days so consider the amount of shading for the transplant locations.
• Chopped up Sphagnum can be spread across a site (e.g., under textiles), or whole Sphagnum ‘clumps’ can be dropped into pools (species dependent).
• Although commercial Sphagnum propagule products are available, these may not be needed on Scottish sites (seed banks and Sphagnum cover generally allow for local transplants). Consider the risk of introducing material as well as the additional costs.
• Polytrichum strictum clumps may be more appropriate for bare peat areas and can act as a nurse species for Sphagnum. Monitoring carried out by Moors to the Future in the Peak District suggests Sphagnum is best planted in areas already vegetated e.g., with cotton grasses to prevent desiccation of translocated plants.
• Consider the site location. It can take a considerable period for vegetation to grow at higher altitudes.
• Consider sowing seeds of more robust plant species on bare peat sites first, e.g. cotton grasses, then spreading sphagnum the year after establishment. This may be partocualrly effective on forest to bog sites that are some distance from ridelines or where other remnants of cotton grasses are found.
• In areas with significant summer dry spells, autumn planting may be more successful, or, in locations more likely to experience significant frost, summer planting may be more successful as long as there is sufficient rainfall to avoid desiccation.
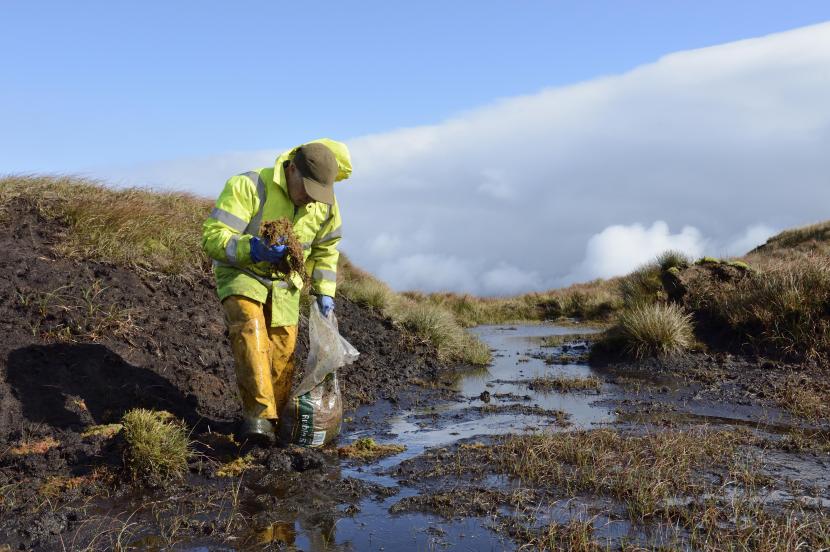
Man adding sphagnum moss to an area of bare peat as part of a Peatland ACTION restoration project.
Click for a full description
Appropriate Machinery
• Planting and spreading is most effective by hand.
• Very good activities to do with volunteers.
When most likely to succeed
• When the water table can support the vegetation you are planting.
• Works well when done by hand and when grazing pressure is low.
• When vegetation is taken from the same niche and translocated to the same niche created by the restoration.
• When the ground surface is already colonised with peatland vegetation, e.g. cotton grasses.
When most prone to failure
• When the water table or peat surface is unstable or when the area is prone to frost heave.
• When e.g. Sphagnum species planted in areas that are not in their ecological niche e.g., Sphagnum cuspidatum planted on a hag top rather than pool or vice versa with Sphagnum capillifolium.
Points to Remember
• Contractors may not be able to identify species so supervision may be required.
Further Guidance & Support
Peatland ACTION Project Officers are available to help you with your project. Please contact us as at [email protected] to be put in touch with your local Officer.
7.7 Using Nurse Grass Seed Mixed With Peatland Species Seeds or Mulch
Aim of the Technique
Grass seeding, with or without more typical peatland species, is sometimes used in order to quickly revegetate extensive areas of bare peat in an effort to stabilise such areas and reduce further erosion. This technique has been applied with apparent success in England, where predominantly mixtures of heather brash and nurse grass seed have been used in conjunction with an initial lime and fertiliser application.
The technique has not been used much in Scotland as early monitoring results from English sites suggested that the newly established, fertilised, swards are attractive to herbivores and remain so for many years. Where this technique is being considered and herbivore grazing pressure is anticipated, fencing maybe required and could be a significant additional cost if restoration sites are remote or high altitude. In addition, the much shorter growing season and higher altitude and exposure to the elements of typical Scottish sites have raised questions over the likely success of this technique. There is also the risk that bringing in seeds that are foreign to a restoration site could introduce pathogens.
At present, Peatland ACTION is considering using this technique on a small trial basis at a few select sites. This section will be reviewed when these trials have been completed and initial outcomes can be reported on.
In the interim, further information on the techniques used in England can be found at Moors for the Future and North Pennines or by contacting the relevant organisations.
Further Guidance & Support
See our technical compendium for other techniques in the series.
Peatland ACTION Project Officers are available to help you with your project. Please contact us as at [email protected] to be put in touch with your local Officer.
Last updated: